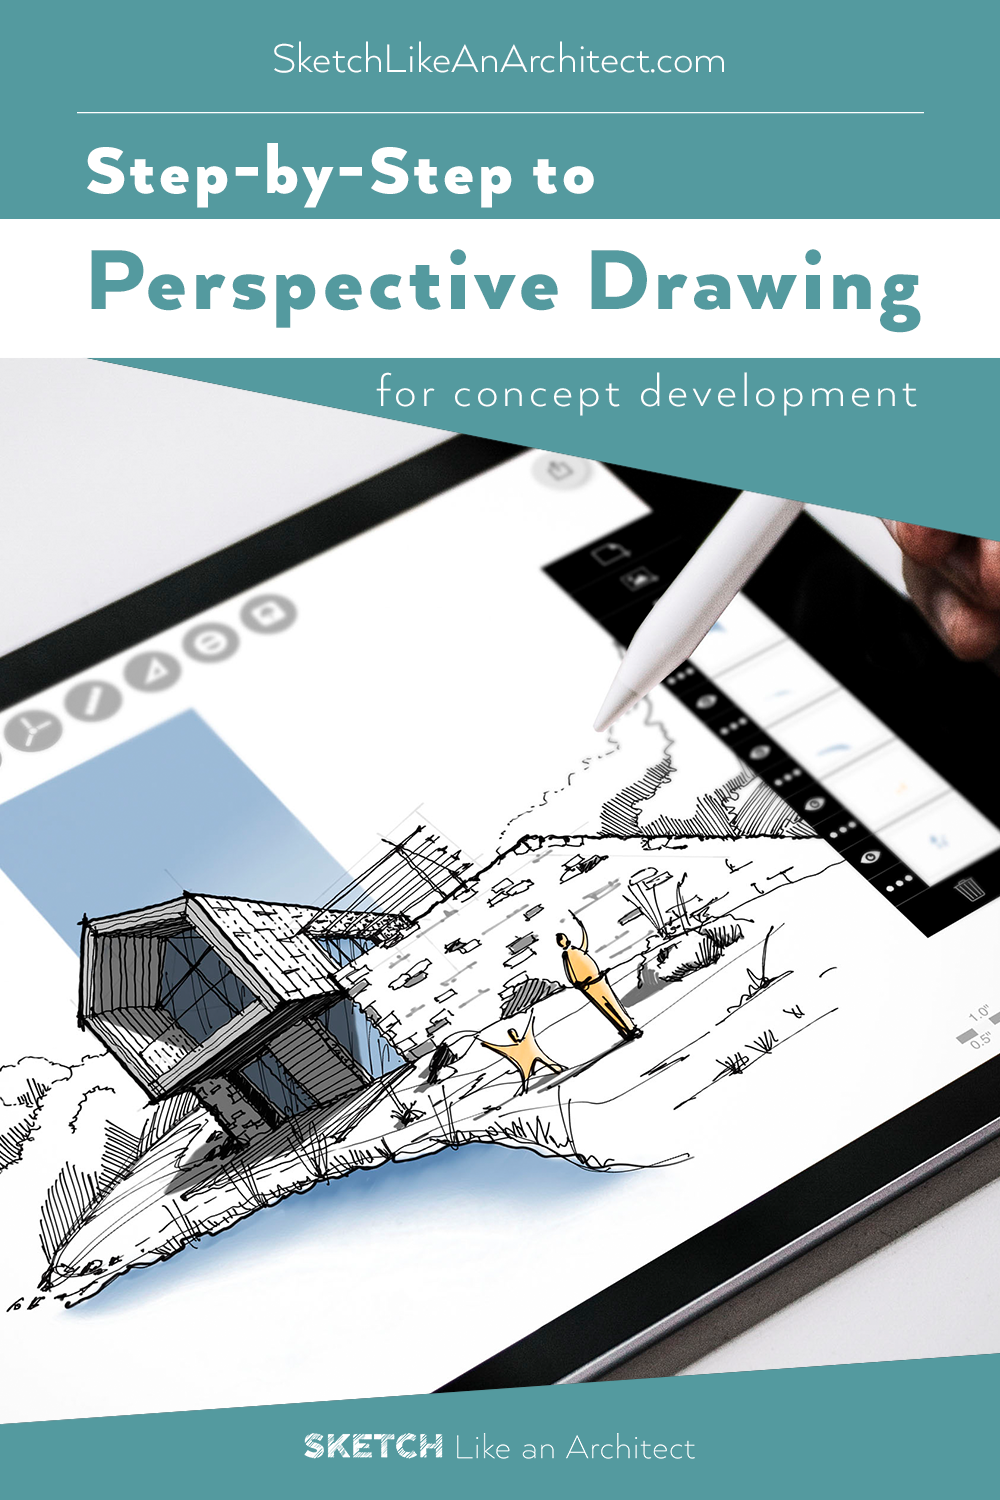
Architecture Concept Development: Perspective Drawing in 7 steps
When assigned with a design project, what is your first step to develop a design concept?
In this article, you’ll get an overview of how I develop a design concept in architecture through drawing and I’ll guide you step-by-step with examples. By the end of this blog post, you’ll know how to use perspective drawing to represent your concept. Let’s dive into it!
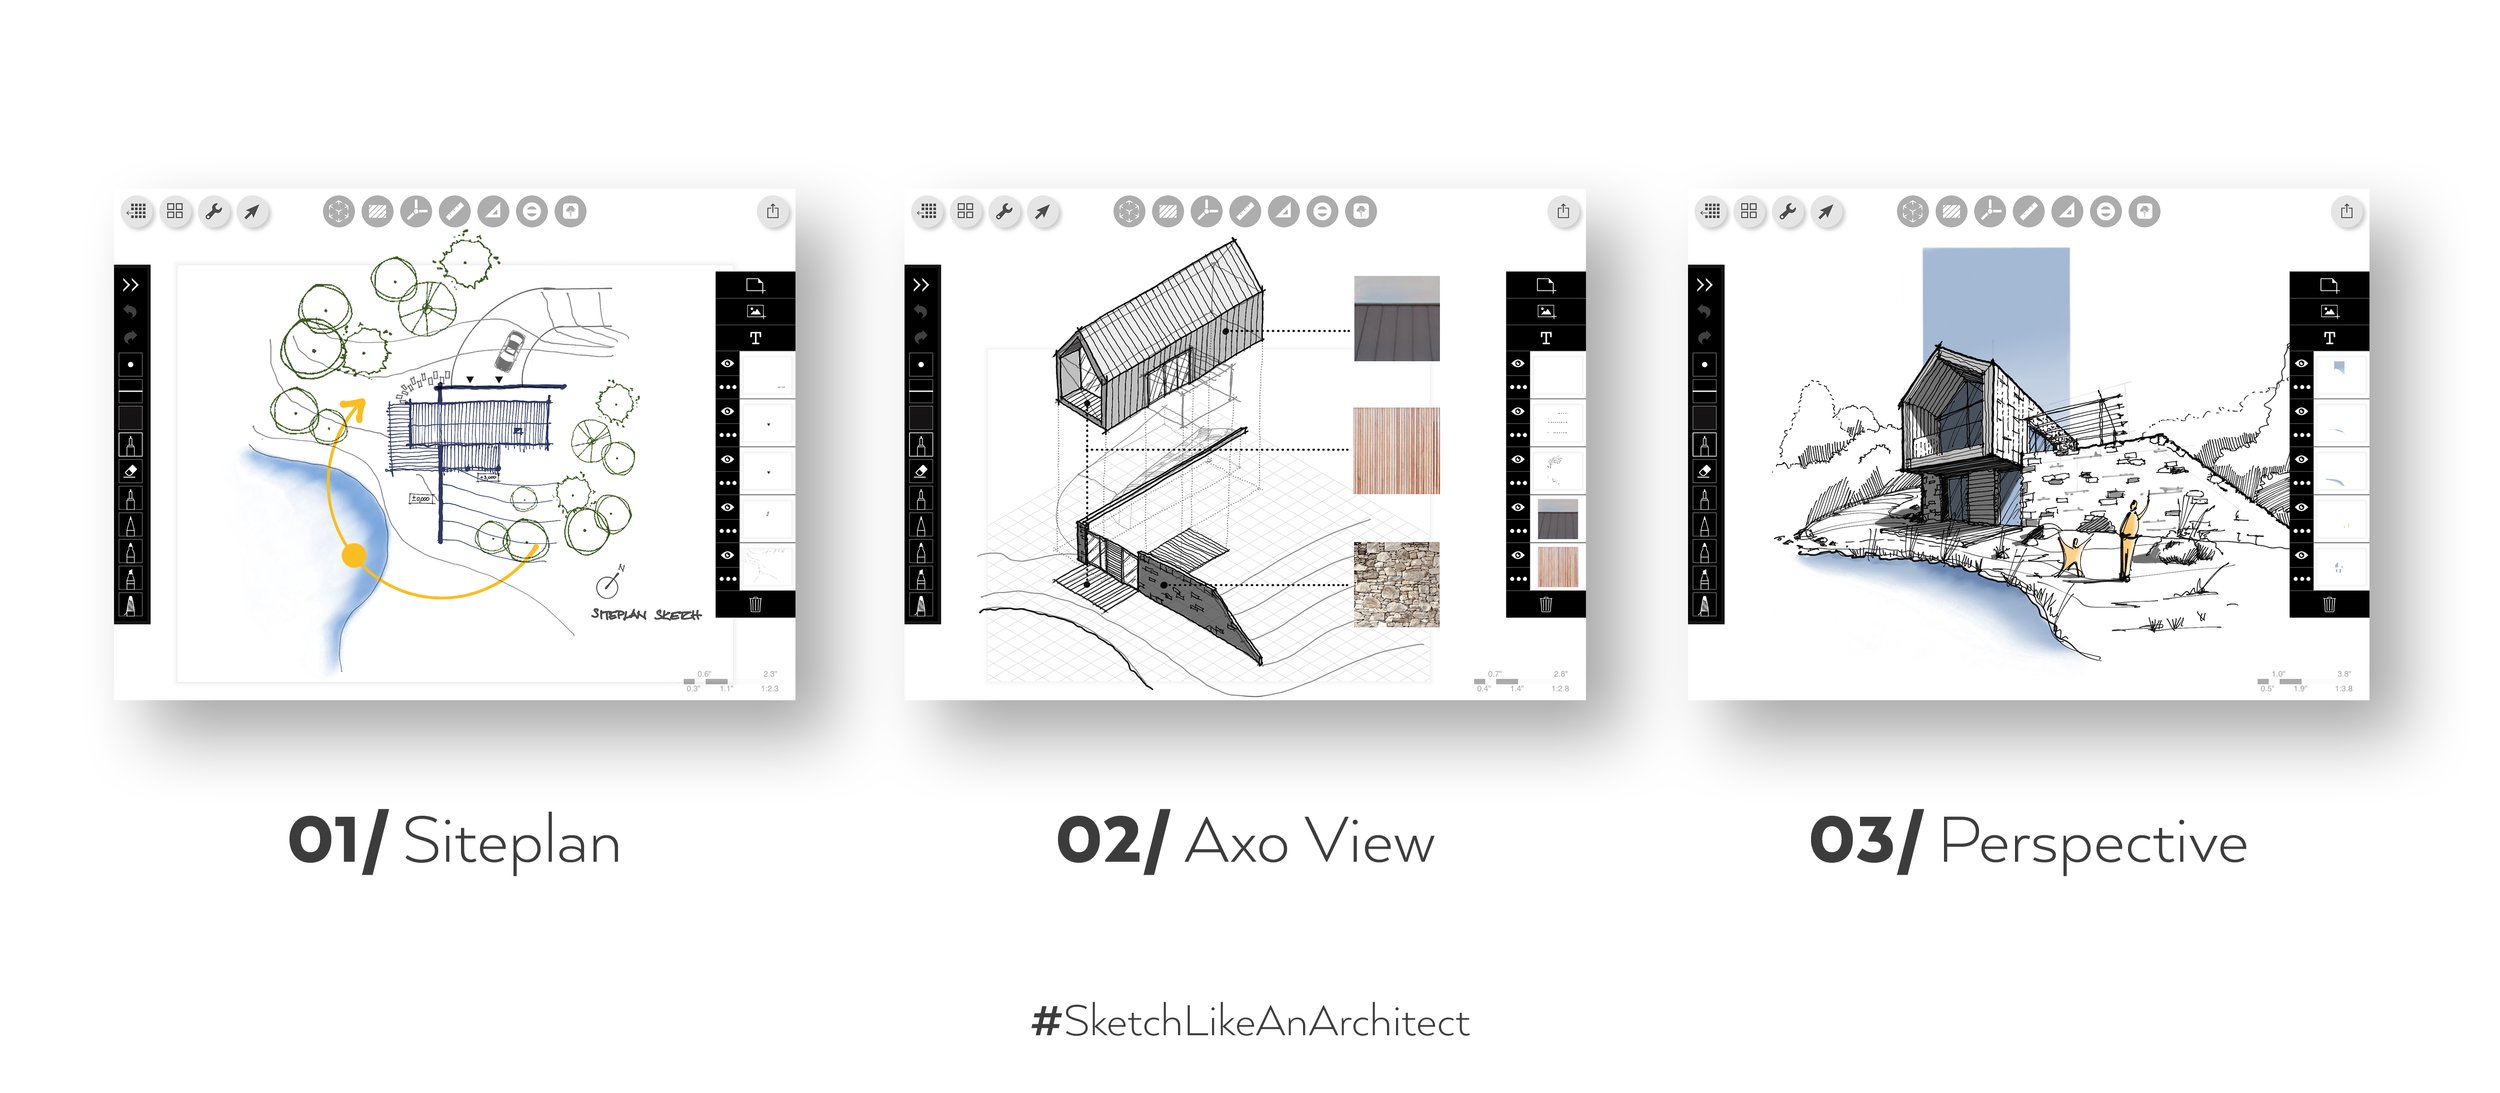
Developing a design concept for architecture can be intimidating and tough, especially for students, but once you learn how to kickstart this task, your creative juices will start flowing. For me personally, I love to use 3 different drawings for architecture concept development : floor/site plan, axonometric diagram and perspective drawing.
Today, we’ll break down a 2-point perspective drawing from scratch and I’ll walk you through all the steps. On top of that, I’ll share some of my thoughts behind the process, including design considerations.
Why Perspective Sketch?
Perspective sketches and drawings show the space in a very similar way to how we actually perceive it in real world. Unlike other architecture drawings - which are often orthographic - perspective views can be more attractive and are more easily understandable by clients and non-professionals.
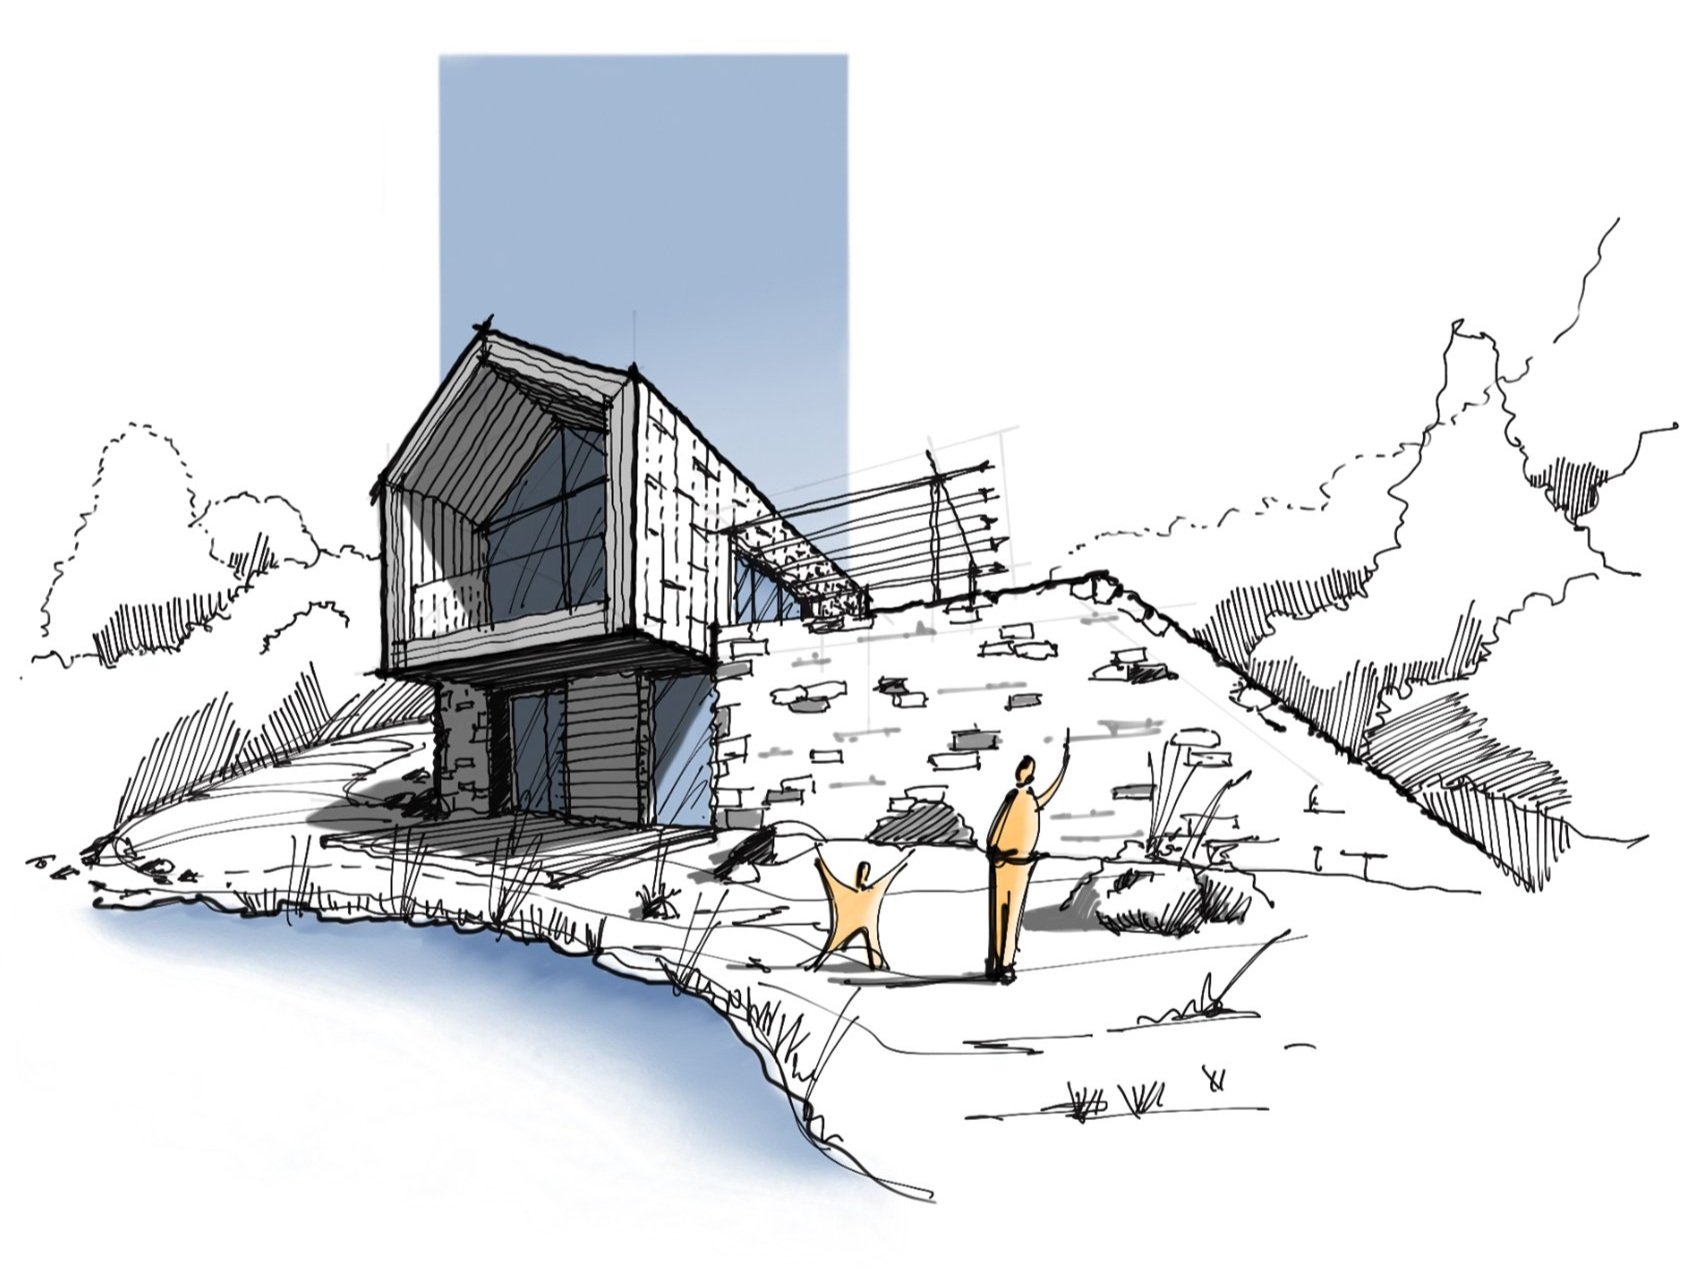
An exterior 2-point perspective drawing conveys important aspects of a design, from how the building looks like in 3D view, to its scale, and the relationship between the architecture and the site context.
Step 1 : Perspective Grid
First, draw a horizon line at your eye level. In a 2-point perspective drawing, there are 2 vanishing points. In theory, the vanishing points are at a 90° angle from each other. But our field of view, which is an observable angle that our eyes really see in reality, is only 40°- 60°. So to keep your view realistic, you only want to include only one of the vanishing points in your picture plane, unless you intend to create a more dynamic & distorted view.
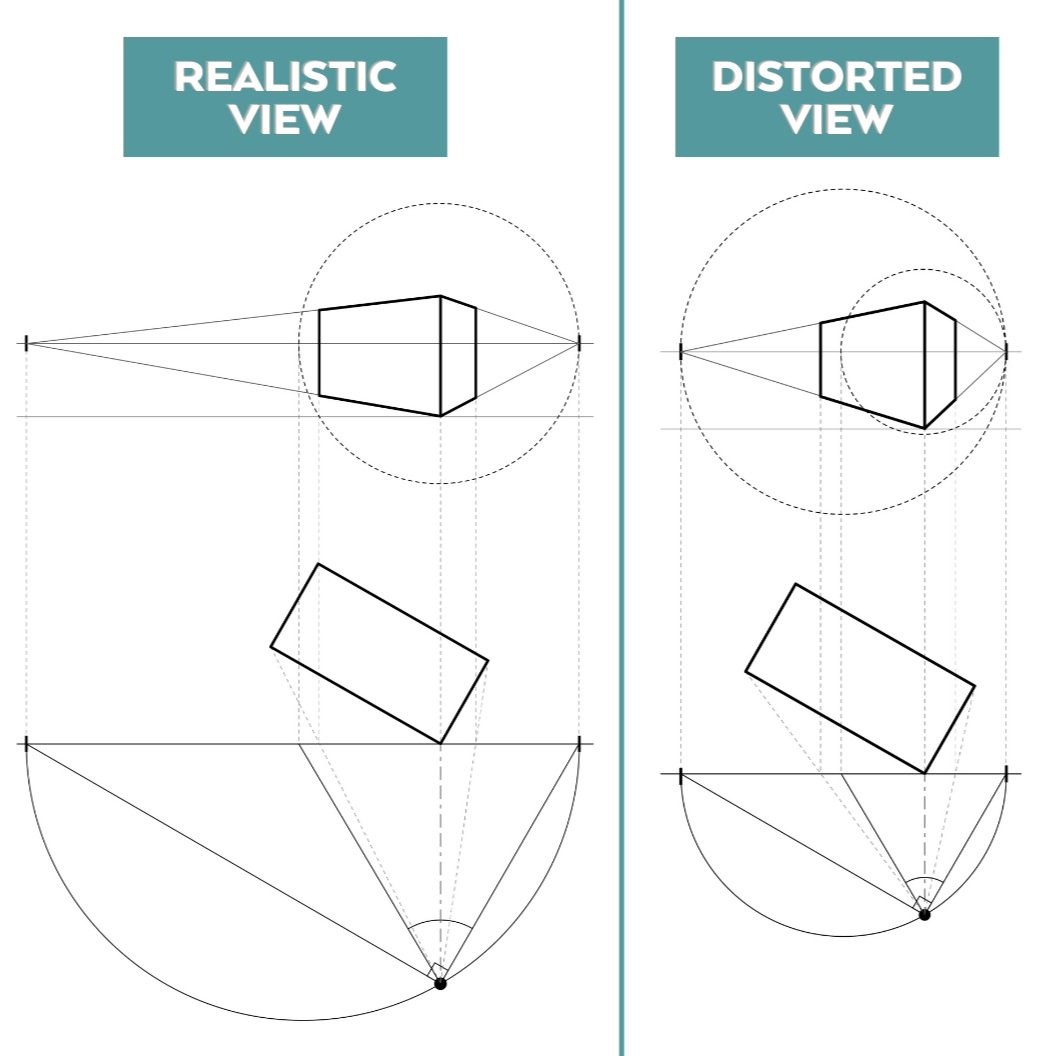
Sounds too complicated? Below are two animated illustrations to help you understand the concept further :
Realistic view

Realistic View in Perspective | 2:11 in the video - click the image to watch full explanation
Field of view basically determines how close we can be positioned in front of an object, in order to see it fully and without distortion. This is why to create a realistic view, you want to set the station point at the right distance.
Distorted view

Distorted View in Perspective | 2:11 in the video - click the image to watch full explanation
This is how it looks like when we are positioned much closer to the same object. Translated into 2-point perspective, the object cannot fit into the realistic cone of vision. This is when we are forced to increase the Field of View angle from 60° to 90°, which results in an exaggerated and distorted perspective view.
Step 2 : Composition
Next, following one of the composition structures - the Rule of Thirds - I placed the cantilevered part of the house, which is the main architectural accent, on the axis of the left vertical third.
Composition & The Rule of Thirds | 4:36 in the video - click the image to watch
At this point, you can use the Rule of Thirds, the Golden Rule, Fibonacci Spiral or other composition structures as guidelines to place the main elements. You don’t need to follow these ‘rules’ with geometric precision, just to get an idea for better composition.
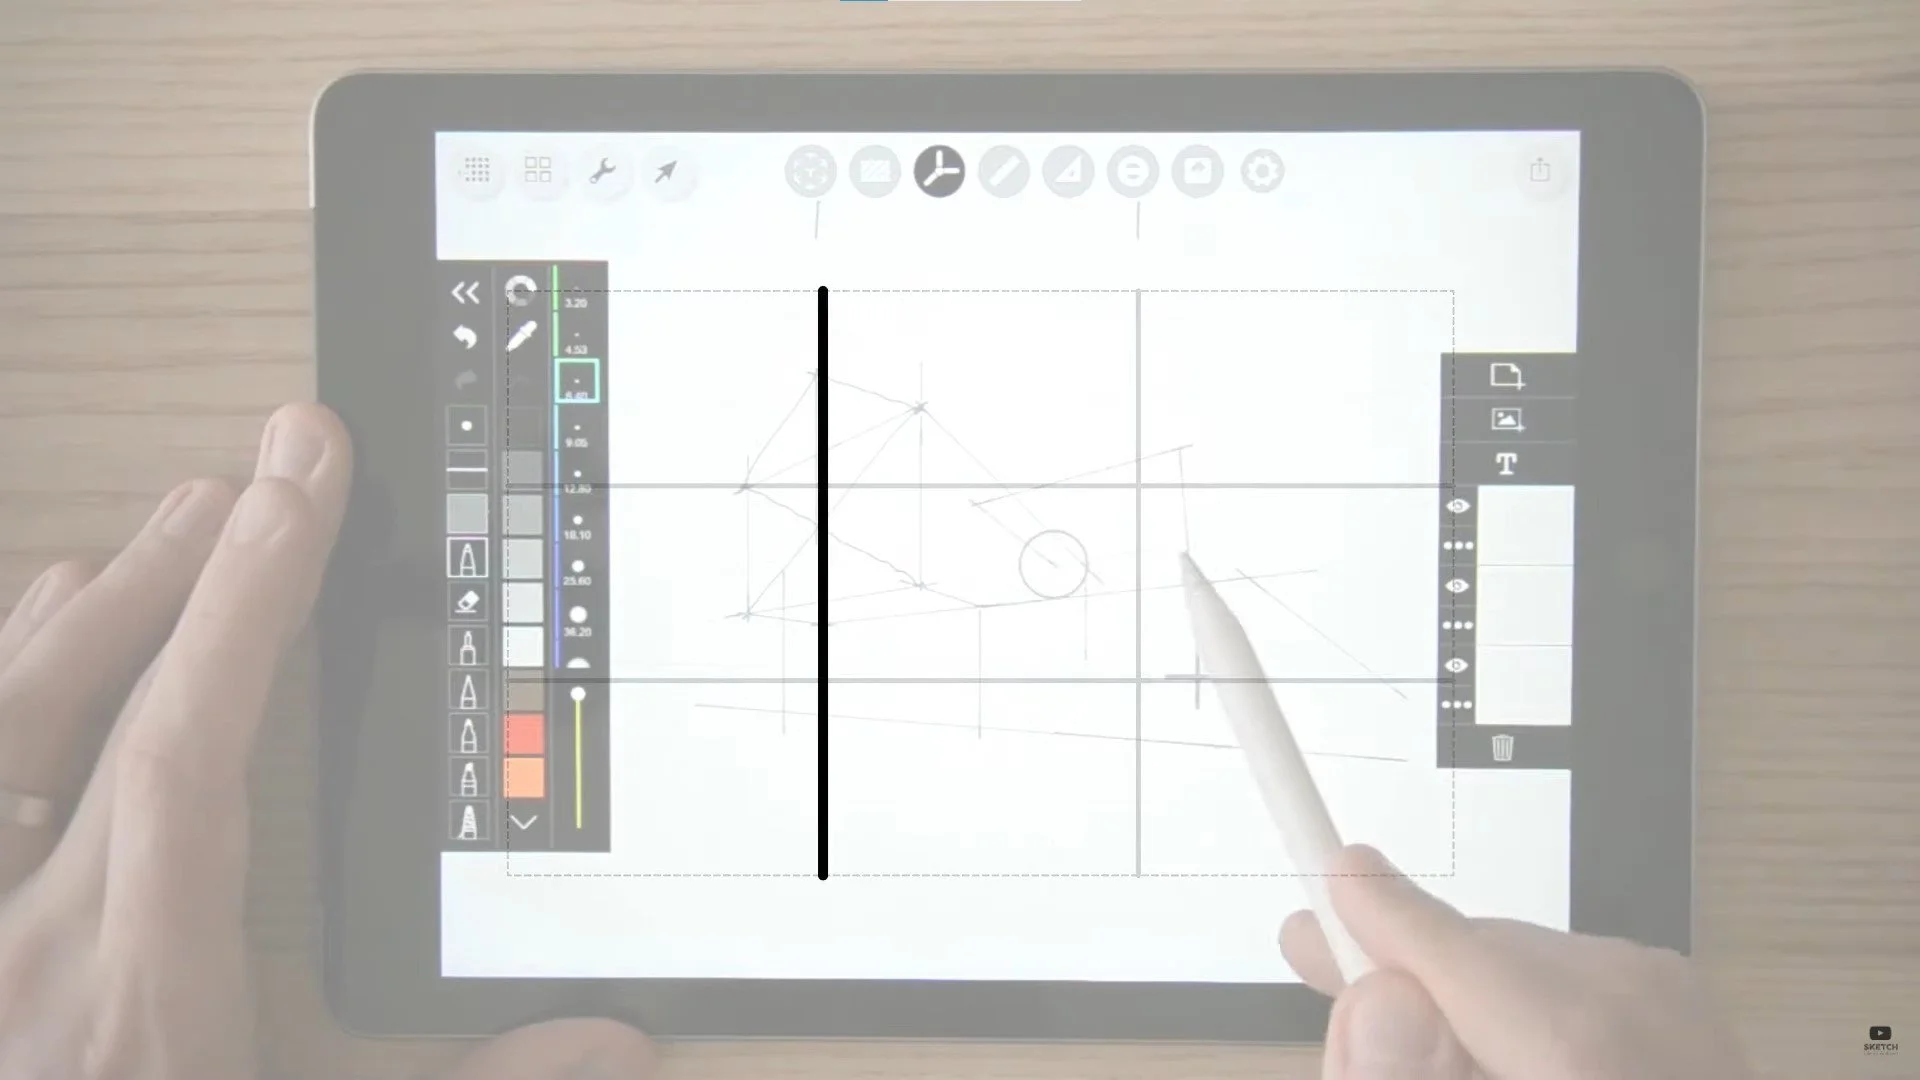
In this case, I was sketching on my iPad using the app Morpholio Trace and I always love to kick off my drawing by creating a perspective grid using a one, two, or three point perspective. It’s really easy to use. Here’s how :
Drag the vanishing points to get the exact grid you want. Tap the green check and start drawing! Hint: You can even use the Perspective Guide to get perfectly straight perspective lines.
Perspective tool in Morpholio Trace on iPad.
Step 3 : Adding Details
Now you can add details to the building, like window divisions, railing, textures, as well as the surrounding terrain, vegetation, and water element to offer important and contextual information to the viewer.
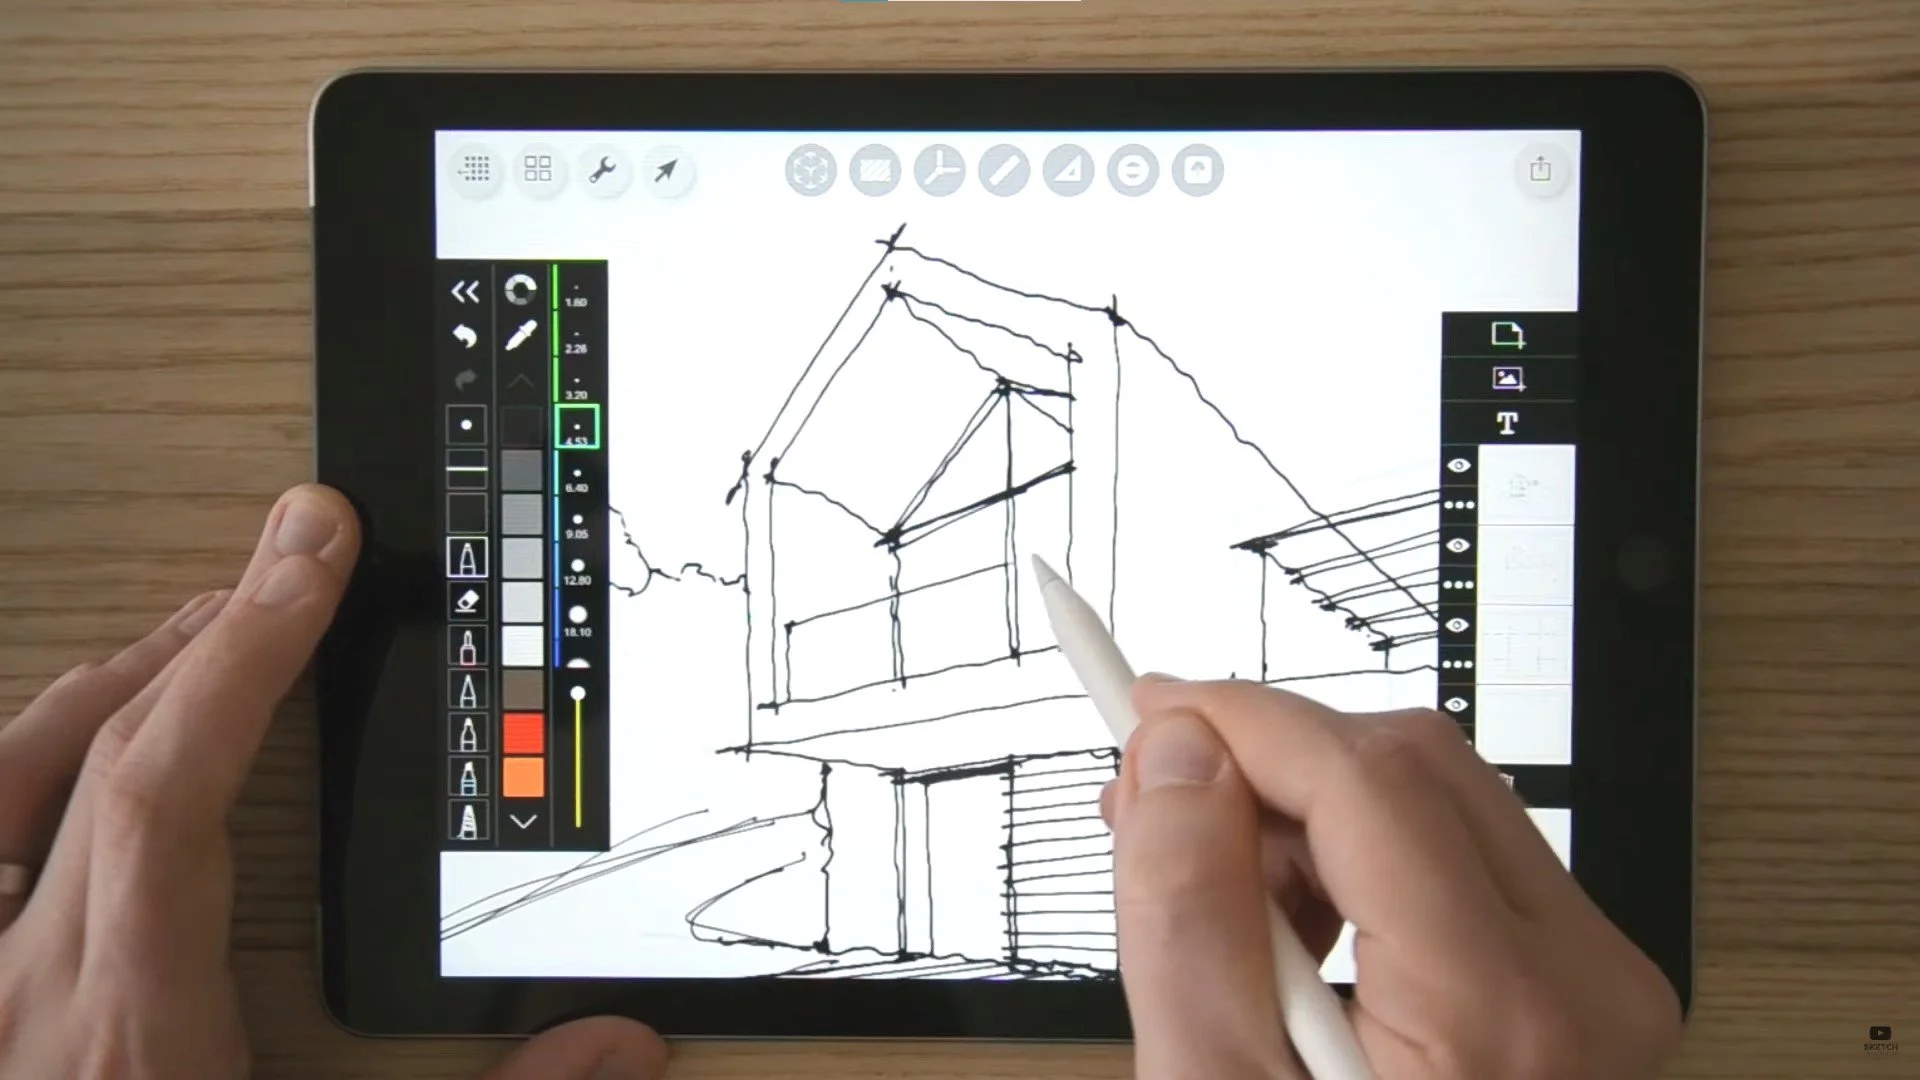
Adding details | 7:07 in the video
This is a tricky part as a lot of us might get caught up in little details, to a point when other parts of the drawing couldn’t get done.
So here’s a quick Tip: Work on all parts of the drawing simultaneously to keep your eye on a bigger picture.
In fact, I wish someone would have given me this piece of advice when I first started out as a beginner. This is why after years of being in this industry and constantly sketching, I have concluded the Top 10 Tips on Architectural Sketching that would certainly help accelerate your skills.
And …. you can now learn it for FREE, yes you heard it. Sign up now by clicking the button below.
After signing up, you will receive one short video everyday where each time I’ll share 2 tips on architectural sketching, including tips on perspective drawing, shading, human figures, vegetation and so on. There will be sketching worksheet provided for every video so you can practice along!
Step 4 : Section Drawing & Sun Path Diagram
I have designed the cantilevered part of the house not just for aesthetic, but also functional purpose as a balcony and shading. To demonstrate that, I sketched a schematic section to show the sun elevation angles at 12 noon during summer and winter solstice. This is because on both days, the sun’s position is the extreme during a year.
But how do you know the sun elevation angle? This is when you need a sun path diagram based on the site location. This project is in Prague, Czech Republic, and the sun path diagram looks like this :
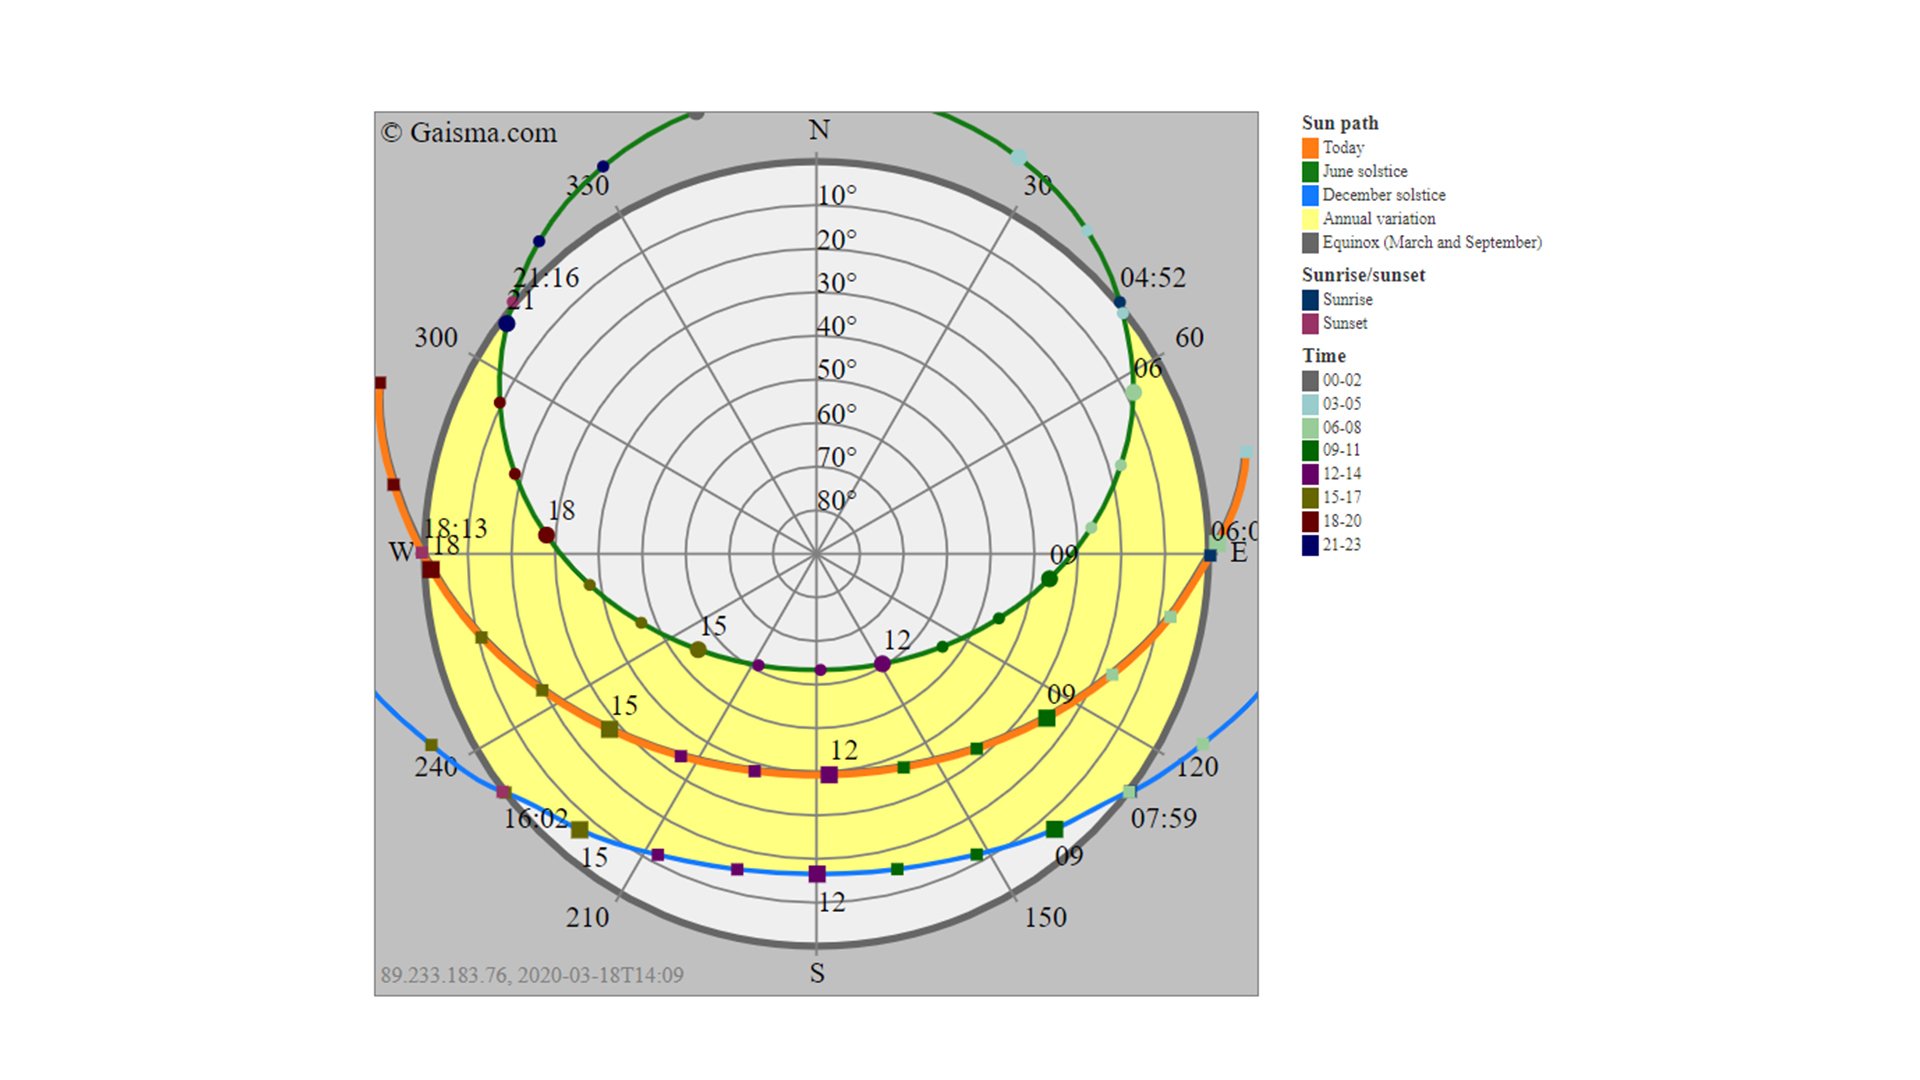
How to use Sun Path Diagram | 8:12 in the video - click the image to watch the full explanation
From this diagram, we have learnt that the elevation angle in June is 60°, while in December it is 16°. This is how I draw it into the section.

How to work with sun path diagram| 9:18 in the video - Click the image to watch the full explanation
Step 5 : Passive Strategies and Considerations
To optimize your architecture design, you should always consider the passive strategies in the early phase of a design concept development. This is to ensure quality indoor environment and low energy consumption. Here are the example of things to consider :
Building orientation
Surface/volume ratio
Glazing ratio on facades
Solar shading
Thermo-stability of soil
Natural ventilation
Step 6 : Selective Texturing
Simply suggest the surrounding without too much detail so that it does not draw attention from the focal area. To save time, I use selective texturing, suggesting a stone wall without filling in and rendering the whole surface.

How to use selective texturing | 11:44 in the video - click the image to watch
Step 7 : Add Shading & Colors
To add depth to the drawings, I always add shadows. In Morpholio Trace, if you want draw shadows over your lines, simply tap layer actions (•••) and change the paper blending to Multiply. This will give transparency to your layer and let you add shadows that magically blends well with the linework.

Add shadows with layer blending
Lastly, I added some colour accents to emphasize the focal area of the sketch. Choose complementary colours - i.e colors on the opposite spectrum of the colour wheel, eg : blue and orange, red and green, yellow and purple. Then use them in strong disproportion - for me personally, I’d usually use these complementary colours in 80/20 or 90/10 ratio.
Lastly, I will emphasize on the focal area of the sketch with blue coloured background to suggest a part of the sky. While doing this, I want to share another Trace trick with you — the Eraser Magic.
Think of your eraser as a drawing tool. By using the opacity adjustment along with the eraser you can softly fade edges to create hierarchy in the drawing or shade specific areas. Hint: Use the ruler and eraser with full opacity to create a squared, sharp edge.

Adding shade & shadow | 14:20 in the video - click the image to watch
So this is how my thought process goes while designing for a commissioned project. I tried my best to summarize them into 7 easy steps so you can follow through. This whole process took me about 45 minutes to complete. The moment you pick up a pen and start sketching, you will come to realize that developing a design concept is not as intimidating as it seems.
I believe if you have read till this end, you must be somehow interested in learning architectural sketching. Maybe you have no idea where to start, so here’s a good news! I have prepared a 5-day mini course for you, where I will be sharing my top 10 tips in sketching. And it is completely FREE!
Not only you will learn some of my best practices, and the “secret tips” that I often refer back to when sketching. But there are also sketching worksheet provided so you can practice along. I believe this will be a super helpful for you especially if you are a beginner. Happy sketching!
Save this pin for your design inspiration!