7 Quick Tips To Improve Architectural Perspective Sketches [Free Worksheet]
HOW TO IMPROVE PERSPECTIVE SKETCHING THROUGH PRACTICE?
Drawing in perspective doesn’t have to be hard but it sure takes some practice. In this article, I am sharing some easy-to-learn tips that you can use as a guide to practice. At the end, there is a free PDF worksheet included to draw along. Let’s begin!
Tip #1: Learn to draw long, straight lines - here’s how
Almost every architectural sketch or drawing is based on lines. The lines are used not only for contours, but also for guidelines, constructional lines, shading, hatching, and texturing—pretty much everything in a drawing.
You’ll find out that most of these lines are simply straight and are sometimes very long. That’s why it’s a great idea to practice drawing confident long, straight lines.
To achieve confidence in long straight lines, I suggest the following:
First, draw with your whole your arm, start the movement from your shoulder, and avoid bending your wrist.
Second, look and focus on the endpoint of a line you’re drawing.
This will help to naturally guide your hand to where you’re looking.
Tip #2: Vary the line weight
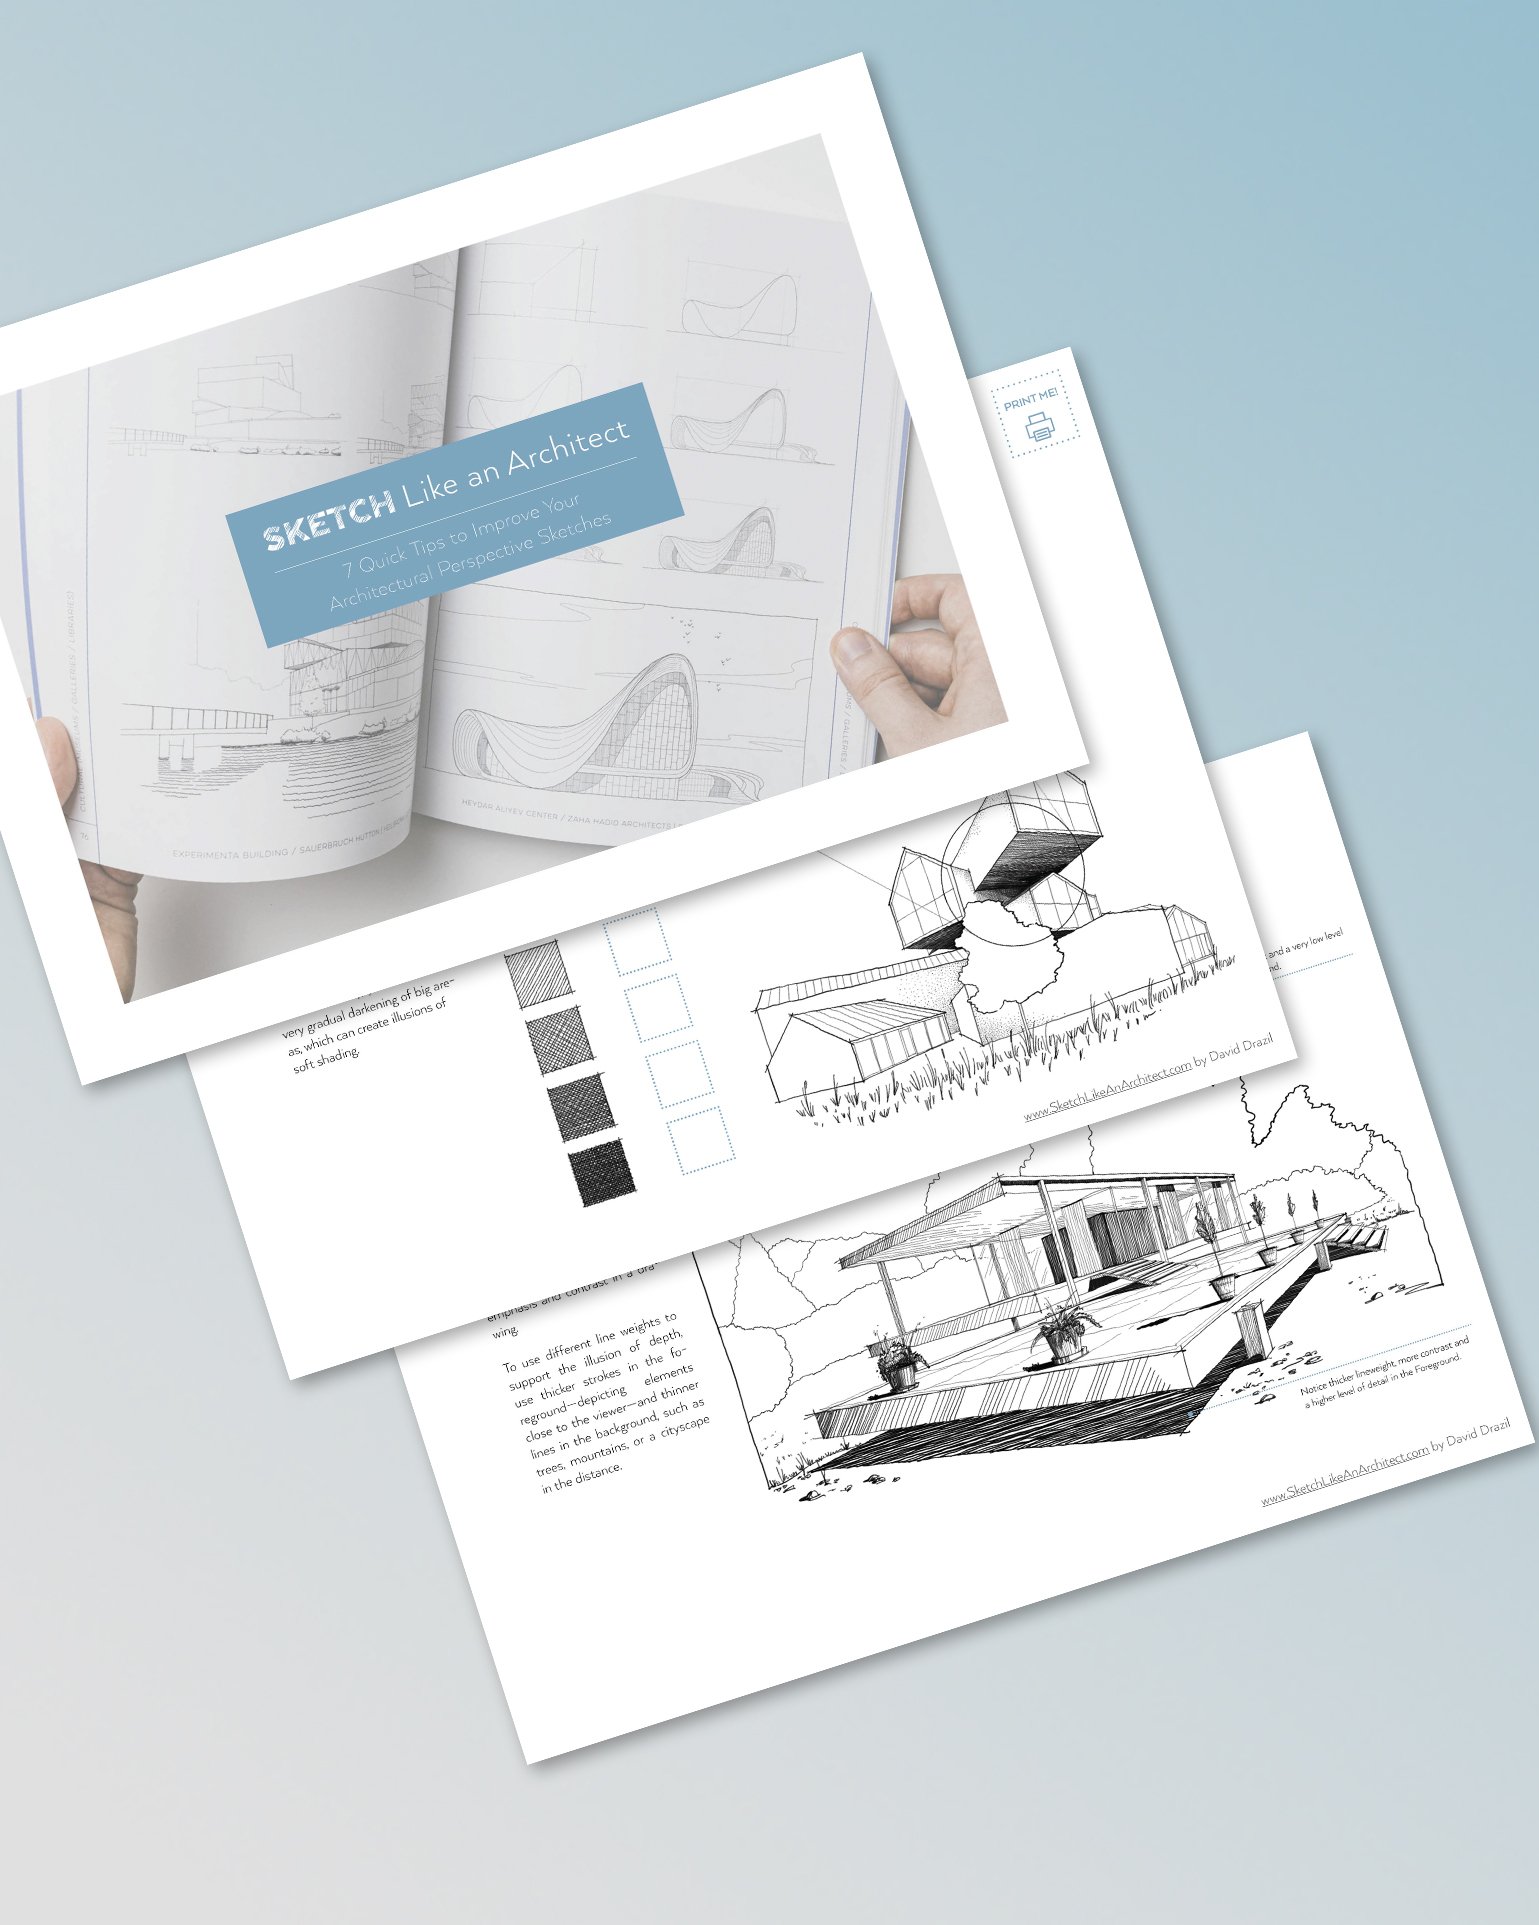
The use of different line weights— thicknesses of pen strokes—serves well for defining depth planes, for better clarity, and for creating emphasis and contrast in a drawing.
To use different line weights to support the illusion of depth, use thicker strokes in the foreground—depicting elements close to the viewer—and thinner lines in the background, such as trees, mountains, or cityscape in the distance.

Notice how the line weight varies between the vegetation in the background and the building in the foreground.
Tip #3: Start with imaginary bounding boxes
Before diving into details, set your main volumes in perspective by drawing imaginary bounding boxes surrounding the main volumes.
These simple boxes help ensure that your perspective view is correct and prepares you to draw more defined volumes and details inside.
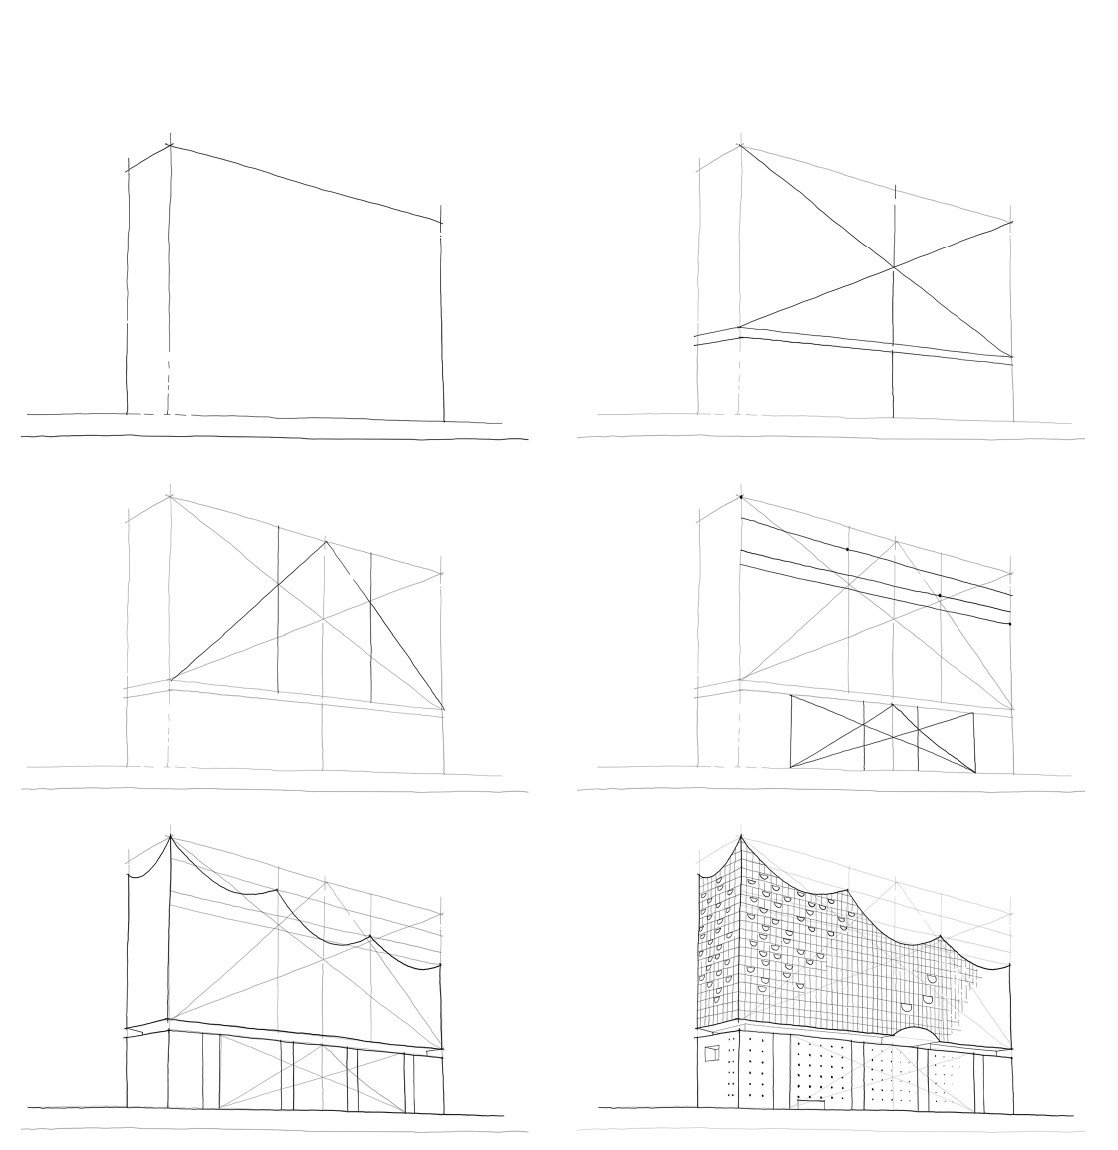
Complexity made simple when using the bounding box technique.
Tip #4 : Use cross-hatching for shading
Hatching is commonly used to add textures or shading. Cross-hatching is the same, just applied in two or more layers on top of each other.
Each new layer should have a different direction from the previous one. In that way, you can achieve very gradual darkening of big are - as, which can create illusions of soft shading.

Use cross-hatching to play with light and shadow.
Tip #5: Divide objects into equal segments
Cross sections and divisions of objects into equal segments help us both with constructing more complex geometries as well as presenting them in a more understandable way.
These basic divisions will help your objects look correctly and with the right proportions, especially in perspective views.
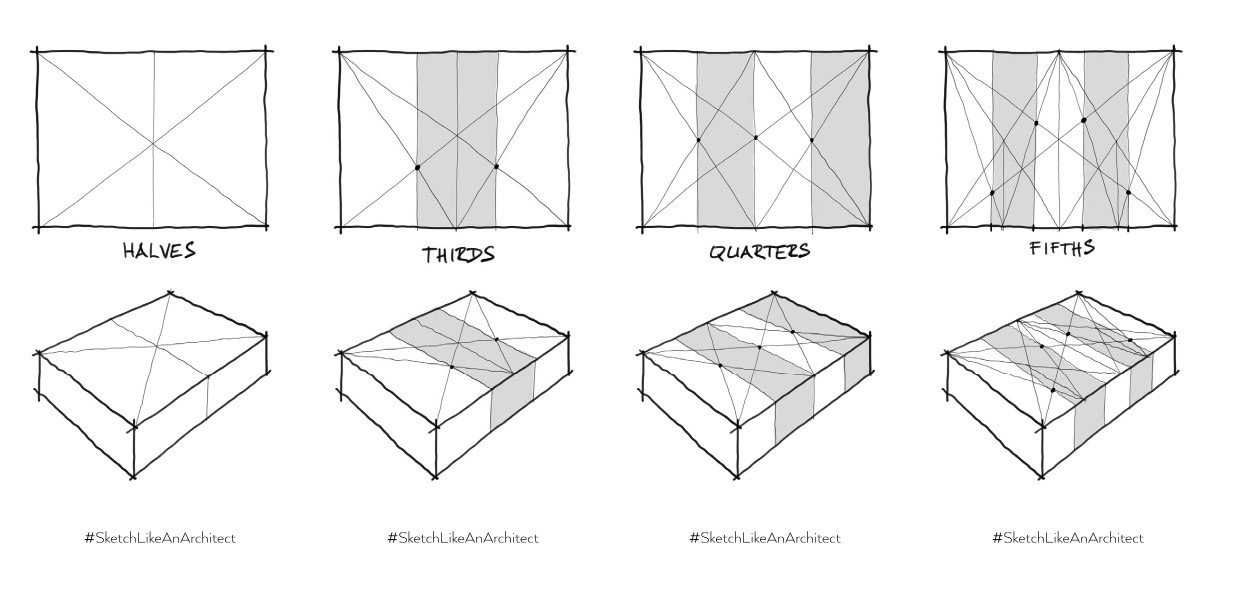
Use this tip to keep your drawing in proportion.
BONUS: Tip #6 & #7
Want to get 2 more bonus tips?
There are two more bonus tips about drawing organic forms in perspective. It is included together with the other five in a free downloadable & printable PDF Guide!
You can click the button below to download the PDF guide.
Have fun sketching. Cheers!
Save this pin for future reference! 👇
